The 1951 Chevrolet Truck Interior
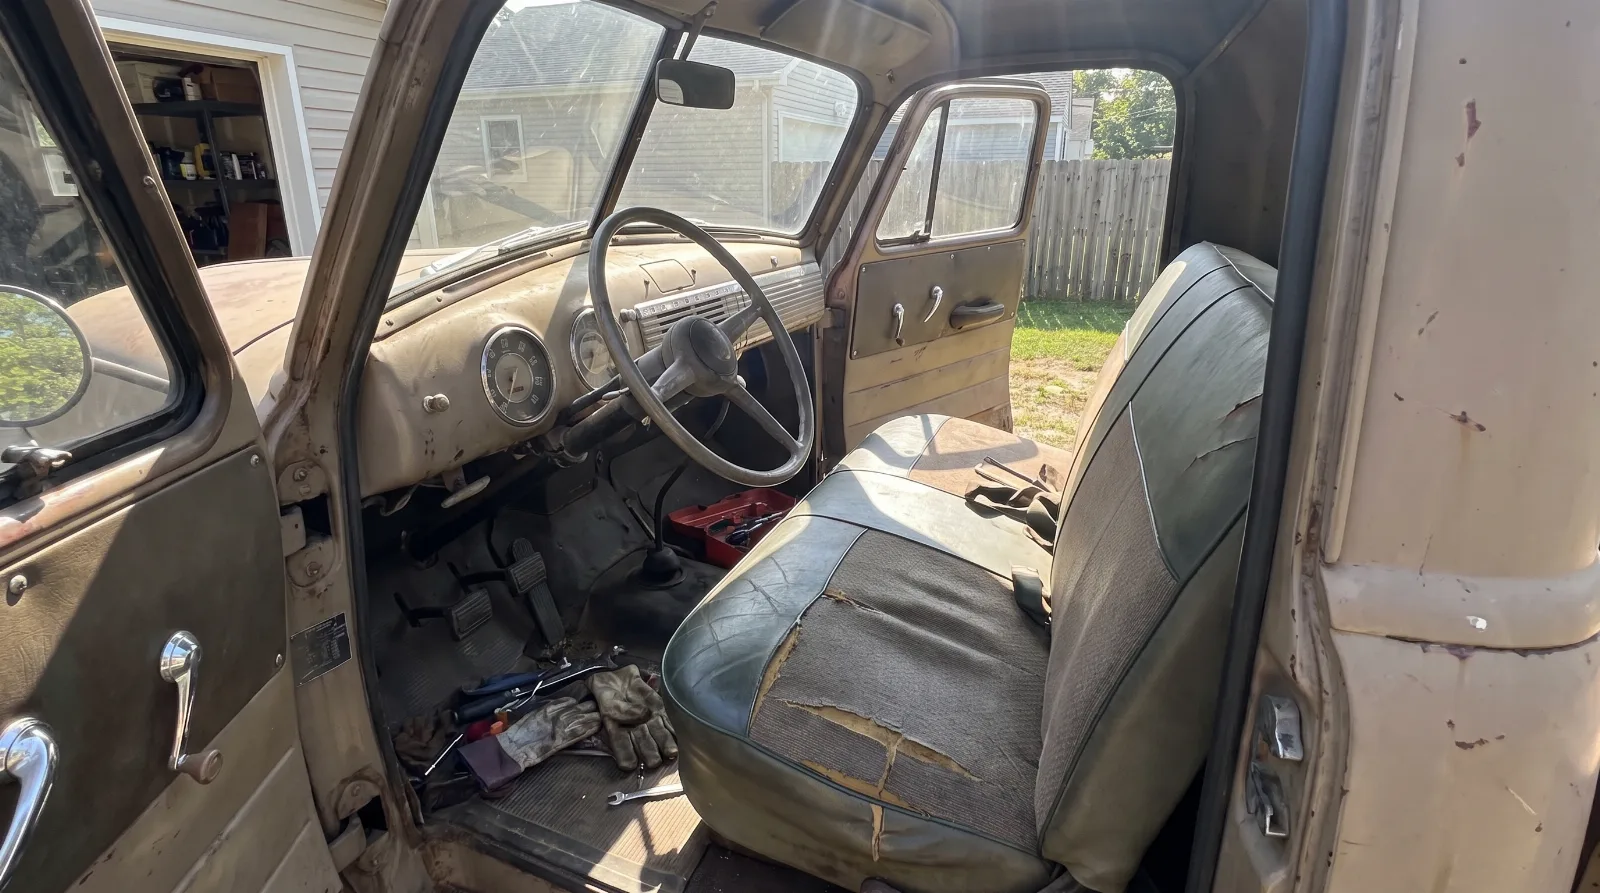
Chevrolet sold the Advance Design truck on its cab. Not on power, because there was not much, and not on payload, because everybody's half ton carried about the same. They sold it on the idea that the man who drove a truck all day should not have to suffer for it, and in 1947 that was a genuinely new argument in the light truck trade.
Sitting in a 1951 today, you can still see what they meant. It is a wide, plain, well lit cab with a bench that takes three, and almost every part of it is reproduced.
What is in there
A full width bench seat, a headlining, cardboard door panels, kick panels in the footwells, a rubber floor mat, and garnish mouldings around the glass. The cab is wider than the truck it replaced, with more head room and more leg room, and Chevrolet paid attention to insulation so that it is quieter than you expect.
The seat is two pieces, a back and a bottom cushion, each built over a steel frame. That frame is the part worth having: the covers, the batting and the foam are all consumables and all available, but a sound original frame saves a great deal of fabrication.
For 1951 the seat gained one specific change. The adjuster mechanism moved from the old metal cable arrangement to a rod running under the cushion. It is a small thing, and it is one of the details that quietly identifies the year once the badges have been swapped around.
| Item | 1951 |
|---|---|
| Seating | Full width bench, three across |
| Seat construction | Steel frame, back and bottom cushion |
| Seat adjuster | Rod under the cushion, new for 1951 |
| Door panels | Cardboard with trim |
| Floor | Rubber mat |
| Window handle knobs | Chrome, last year |
| Wiper knob | Chrome, last year |
| Cowl vent | Gone, replaced by door vent windows |
Reupholstering the seat
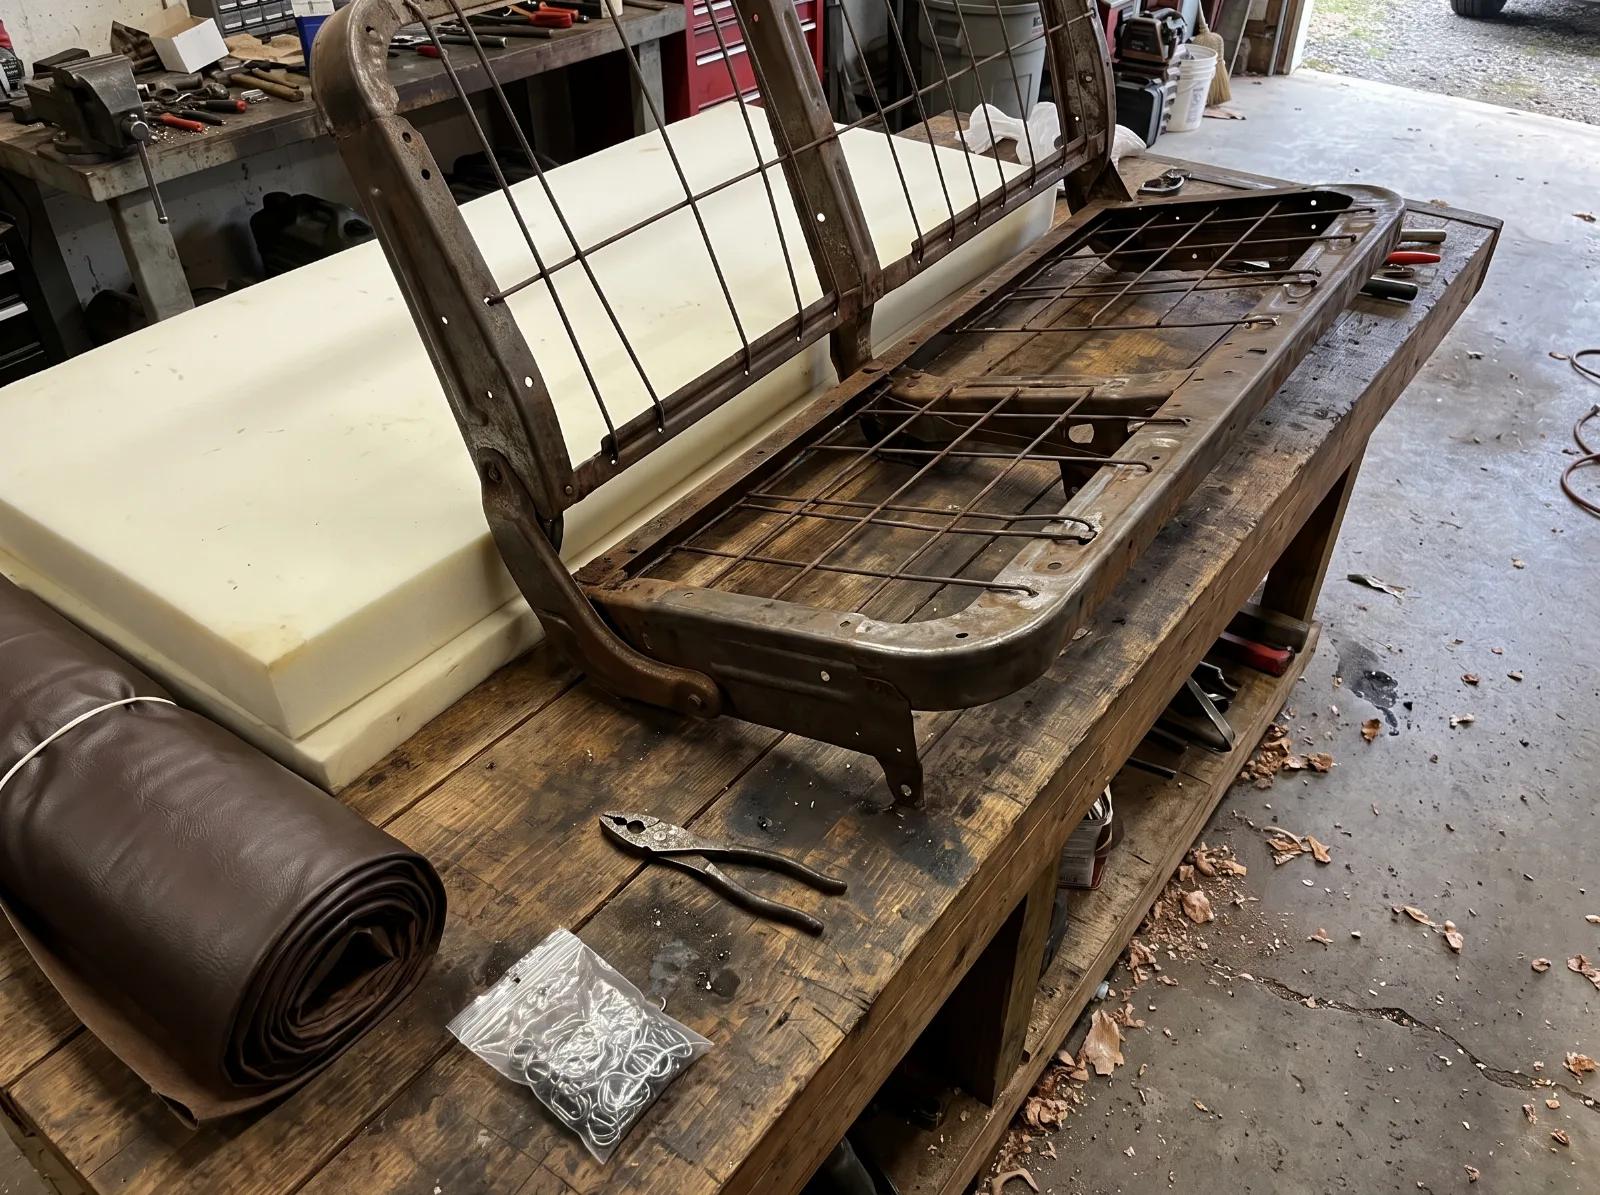
This is the one interior job most owners think about paying somebody else to do, and it is also the one that is genuinely within reach at home. The seat comes apart into a back and a bottom, both built on the original steel frames, and what goes back on is a reproduction cover over fresh foam.
The usual build is two layers. A half inch scrim backed foam goes on first, then a quarter inch seat pad on top, the two bonded together with spray adhesive. Then the cover is stretched over and secured underneath with hog rings, which is where the special tool comes in: a pair of spring loaded hog ring pliers and a bag of rings, neither expensive and both essential. Trying this with ordinary pliers is a bad afternoon.
The seat back attaches to the frame loop in the cab with stainless screws. The order that works is to do the back first while you still have patience, because the bottom cushion is the fiddlier of the two.
"The seat is the one thing in that cab you touch every time you use the truck. Spend the money there and skimp on something you only look at."
— Earl Dawson
The rest of it, and what to expect
Headlinings, door panels, kick panels, armrests, window cranks and door handles are all reproduced for these trucks, and the quality is generally good. So are the small screw sets, which sounds like a trivial thing until you are trying to hold a windscreen garnish moulding up with one hand and the wrong screws in the other.
What is not reproduced is the cab itself, and interior work on a cab that leaks is money thrown away. Water comes in around the windscreen, around the corner windows on a Deluxe cab, and up through the floor, and it will find a new headlining and a new floor mat faster than you think. Fix the glass rubbers and the floor before anything soft goes in.
The other honest warning is about sequence. Interior goes in last, after the wiring, after the dash, after the glass. Everybody knows this and half of us have still done it in the wrong order at least once, and then dragged a wiring loom across a new seat.
Check this first
- The floor, from underneath. A new mat over a rotten floor is a decoration, not a repair.
- Whether the seat frames are sound. Covers and foam are cheap, frames are not.
- The windscreen and vent window rubbers. Every leak in this cab starts at a rubber.
- Whether the knobs are chrome. A 1951 detail, and the fastest sign the interior came from a later truck.
- The seat adjuster. A rod under the cushion is 1951, a cable is earlier.
- The garnish mouldings for splits and rust. They are visible, they are fiddly, and they get overlooked until the end.
Where this fits
The cab this trim goes into is in the Deluxe cab option, and the truck it belongs to is the half ton itself. The dashboard in front of the seat is in the truck instruments, the wiring behind it is in the wiring, and where interior work falls in the sequence of a full job is in the truck rebuild. The car equivalents are in the 1951 interiors, and the range as a whole is in the light truck range.
Sources and notes
- 1947-1953 Chevy Advance Design interior seat reupholster, In The Garage Media - the seat as a back and a bottom cushion built over the original steel frames, the reproduction covers, batting, door panels, armrests, window cranks and door handles available, the half inch scrim foam and quarter inch seat pad bonded with spray adhesive, the hog rings and spring loaded pliers, and the seat back screwed to the frame loop in the cab.
- 1951 Chevy truck parts, Chevs of the 40s - the seat adjustment changing from a metal cable to a rod under the cushion for 1951, the left side cowl vent eliminated in favour of door vent windows, and the interior categories from carpet and upholstery to windlace and seat parts.
- Comprehensive history of 1947-1955 first series Advance Design, Deves Technical Network - chrome window handle knobs and the chrome wiper knob discontinued after 1951, the earlier change of the wiper knob and cowl vent handle from maroon plastic to chrome plated steel, and the door glass becoming two piece with vent windows.
- 1952 Chevrolet 3100, Horsepower Enterprises - the wider Advance Design cab with more head and leg room, designed around cab comfort and safety.
- Advance Design 1947-1955, Classic Chevy Trucks - the brightwork eliminated across 1952 and 1953 because of Korean War shortages, which is what makes the 1951 chrome details specific to that year.
- Chevrolet Advance Design, Wikipedia - the door vent windows arriving for 1951 and the last year for the chrome window handle knobs and chrome wiper knob.
More from the garage
Rebuilding a Chevy 216
Rebuilding a 216 is not like rebuilding anything made after about 1955, and the difference is not the tools. It is that on most engines the botto...
The 1951 Chevrolet Apache
There is no 1951 Chevrolet Apache. The Apache name belongs to the generation of Chevrolet trucks that came after the one built in 1951, and it do...
The 1951 Chevrolet Impala
There is no 1951 Chevrolet Impala. The name did not exist in 1951, the car did not exist in 1951, and nothing Chevrolet built that year was ever...