The 1951 Chevrolet Gauges
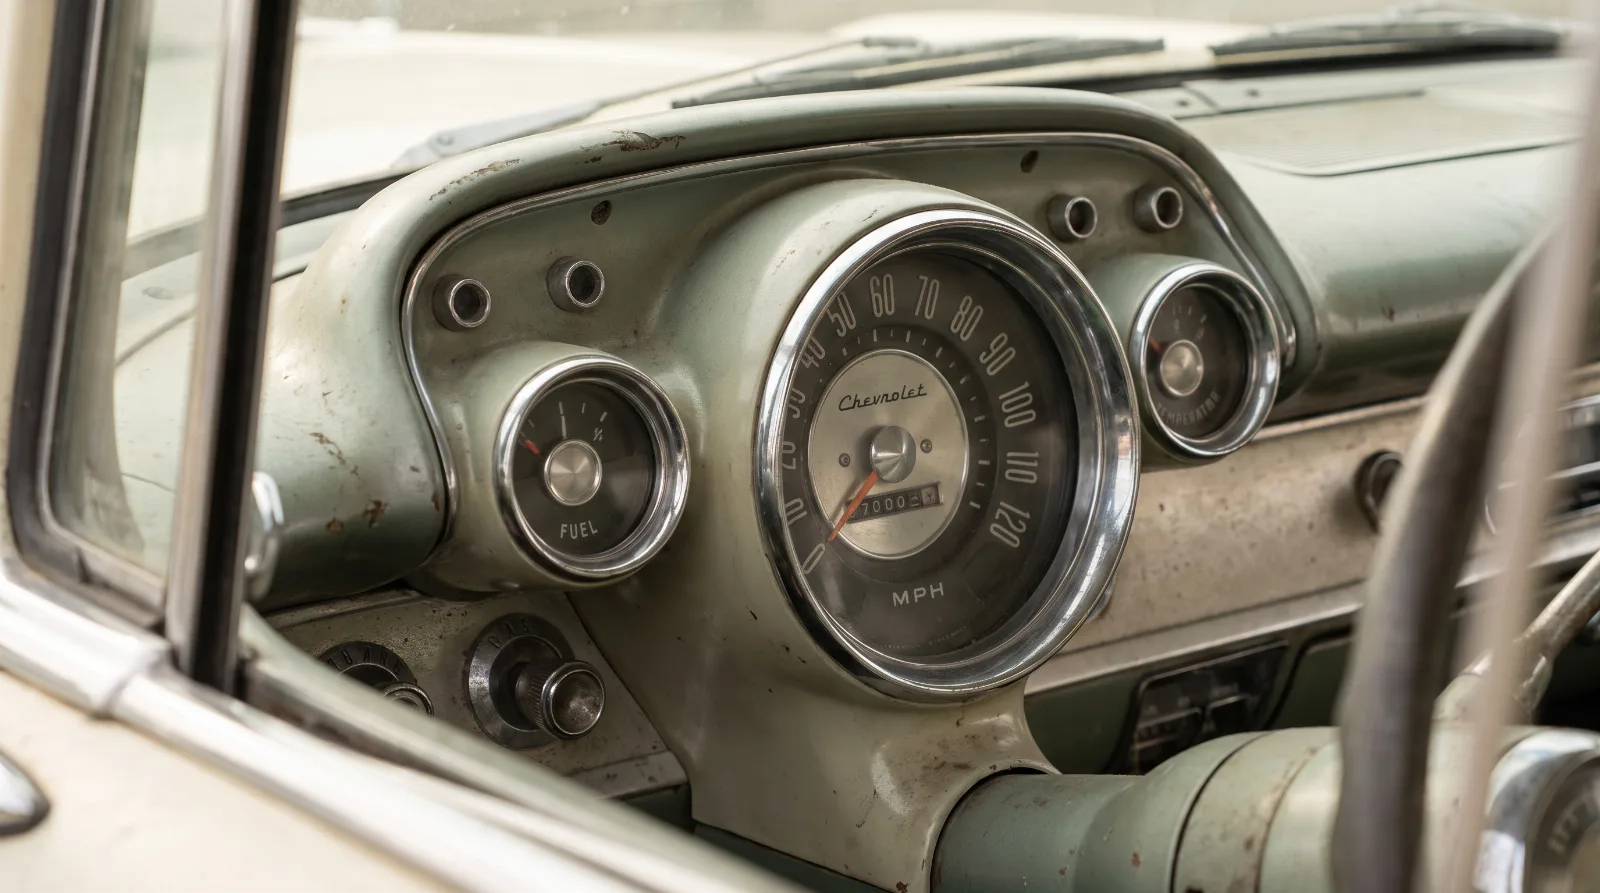
Four gauges in the cluster, and three of them are not electrical at all. That is the thing to understand about a 1951 dash before you start diagnosing anything: two of those needles are moved by a pipe running from the engine into the cab, and if the needle is wrong the fault is very often somewhere along that pipe rather than in the gauge.
Once you know which gauge works which way, the whole panel stops being mysterious and becomes a short list of specific things that fail.
What is in the cluster
| Gauge | How it works | What connects it |
|---|---|---|
| Oil pressure | Bourdon tube, mechanical | A narrow pipe carrying engine oil at pressure, into the cab |
| Water temperature | Bourdon type, mechanical | A copper capillary tube, sealed, with alcohol inside it |
| Fuel level | Moving magnet, electrical | A float sender in the tank, 0 to 30 ohms |
| Ammeter | Current passes straight through it | Battery to fuse box, the whole load |
A Bourdon gauge is a flattened tube bent into a curve. Put pressure inside it and it tries to straighten, and that movement drives the needle. Simple, accurate, entirely mechanical, and completely dependent on a sealed path from the engine to the dash.
The two that leak into the cab
The oil pressure gauge is the one worth thinking hardest about. There is a narrow pipe running from the engine, through the bulkhead, to the back of a gauge sitting a foot from your knees, and it is full of oil at whatever pressure the engine is making. Joints work loose. Ferrules fail. When that happens you get oil inside the cab and you lose it from the engine, and neither is a small problem.
It is not a reason to panic about the design, which worked for decades. It is a reason to look at the fittings whenever you are under the dash for anything else, and to take a smell of oil in the cabin seriously rather than assuming it is coming from outside.
The temperature gauge has the same geometry with a much smaller consequence: the capillary tube is sealed, so a failure gives you a dead gauge rather than a mess.
The ammeter, and why people replace it
An ammeter does not sample current, it carries it. All of it. Battery to fuse box, straight through the back of the instrument, which on this car means well over thirty amps passing through a connection behind a panel you cannot see.
That is a fire risk and it is not a theoretical one. A short on that circuit has the whole battery behind it and enough current to melt wiring. This is why swapping the ammeter for a voltmeter is one of the most common modifications made to these dashes, and why it is one of the few modifications I would call sensible on an otherwise original car. A voltmeter taps the system rather than carrying it, and it tells you very nearly as much.
"There is more current going through the back of that little needle than through anything else in the cab. Every time somebody tells me the wiring behind their dash is a bird's nest but it has been fine for forty years, that is the wire I want to look at."
— Earl Dawson
The fuel gauge and its sender
This is the electrical one, and it is a moving magnet meter. The sender in the tank is a float on an arm working a variable resistance, and the range matters: zero ohms at empty, thirty ohms at full.
That range is the reason a modern sender fitted to an old gauge reads nonsense. Later systems use different ranges entirely, and the gauge has no way of knowing. If your fuel gauge reads full at half a tank or sits on empty with fuel sloshing about, check what sender is in the tank before you condemn the instrument.
Check this first
- The oil pipe fittings, both ends. Any smell of oil in the cab starts here.
- The capillary tube for kinks or a crushed section. Gauge and tube are one part, so damage means replacement rather than repair.
- Sender resistance against 0 to 30 ohms. Measure it before you buy a fuel gauge.
- The heavy connections behind the ammeter. Loose or corroded, with the whole battery behind them, is how fires start.
- Ground quality at the cluster. On six volts a poor ground makes every electrical gauge lie.
- Whether the cluster is original or a modern retrofit. Plenty have modern meters fitted inside the original housing, which looks right and behaves differently.
What the gauges are telling you about
Every needle on that panel points at a system with its own page. The ammeter is reporting on the generator and regulator, and which way it swings depends on the polarity of the whole car. The oil pressure gauge is reporting on an engine that was quoted at a number people find alarmingly low, which is explained in the 216 specifications. The temperature gauge is watching the cooling system. And every circuit behind the panel is drawn in the 1951 wiring diagram. If you are thinking of leaving six volt behind, read the 12 volt conversion first, because every gauge on this panel is part of that decision.
Sources and notes
- 1947-53 Chevy truck gauges, 1952chevytruck.com - the four gauge cluster of oil pressure, ammeter, fuel and water temperature, the Bourdon tube as a flattened curved pipe that straightens under pressure, the narrow high-pressure oil pipe running into the cab and the leak risk at its joints and ferrules, the sealed copper capillary tube with alcohol expanding under coolant heat, the moving magnet fuel gauge with a 0 to 30 ohm float sender, the ammeter carrying over 30 amps between battery and fuse box and the fire risk that creates, and retrofitting modern moving magnet meters inside the original housing.
- 1951 Chevrolet truck dash components and gauges, Classic Industries - what is reproduced for the 1951 cluster: speedometer, temperature, fuel, ammeter and oil pressure gauges and complete instrument clusters.
- Original instrument gauges, Chevs of the 40s - the original-specification gauge parts available for these cars, catalogued by year.
- 1947-1959 Chevy truck model years identification guide, Classic Industries - the 1951 speedometer reading to 80 mph against 90 from 1952, and 1951 as the last year for the chrome wiper knob and chrome window handle knobs on the dash.
- Chevrolet 216 specs, It Still Runs - the quoted oil pressure figure of 14 psi that the gauge on this dash is reporting against.
- Working with a positive ground, Auto Restorer - ammeter connections reversing with polarity, and permanent magnet motors running backwards when polarity is wrong.
More from the garage
Choosing a Wiring Harness for a 1951 Chevrolet
Original cloth harness or a modern fused kit, car set or truck set, 6 volt wire and the generator question: how to pick the right 1951 Chevrolet...
6 Volt to 12 Volt Conversion
The six volt to twelve volt conversion is the most argued-about job on an early Chevrolet, and most of the argument is between people who have ne...
The 1951 Chevrolet Generator and Regulator
A 1951 Chevrolet charges its battery with a generator and a regulator, not an alternator. Those are different animals, they fail in different way...